
In This Article
- Define Your Studio's Purpose
- Measure Your Space
- Map Your Equipment List
- Plan the Cable Infrastructure
- Design the Furniture Layout
- Choose Your Surface Materials
- Set Your Timeline and Budget
Planning a radio studio is one of the most complex interior design challenges in the professional world — and one of the most expensive to get wrong. A desk that's the wrong size, in the wrong position, with inadequate cable management can force a rebuild within two years.
After 35 years of building radio studio furniture for stations across all 48 states, we've seen every planning mistake in the book. This guide distills what we've learned into a straightforward framework for getting it right the first time.
Step 1: Define Your Studio's Purpose
Before you measure a single wall, answer the most important question: what actually happens in this room?
Radio studios are not interchangeable. An air studio for a solo morning host has completely different ergonomic requirements than a talk studio for four panelists, which is completely different from a production room where an editor cuts commercials and voiceovers all day.
The most common studio types and their key characteristics:
- Air/On-Air Studio: 1—2 operators, broadcast board centered, mic position primary, immediate access to equipment.
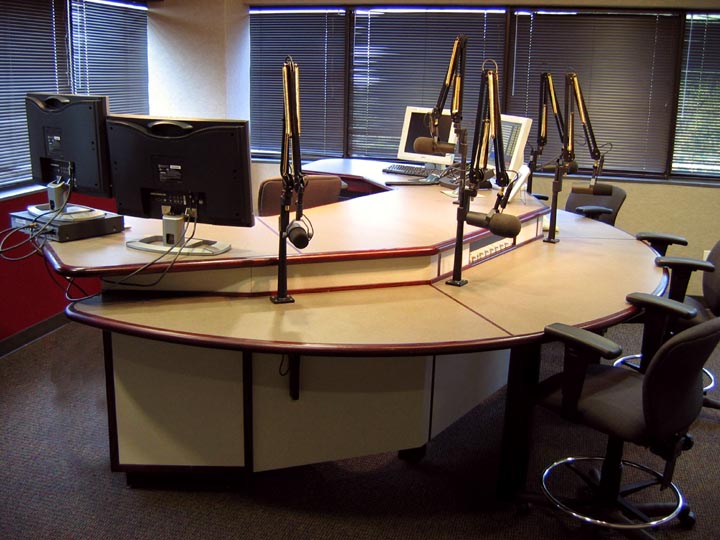
- Talk Studio: 3—6 positions, round or U-shaped, equal positioning, guest comfort important.
- Production Studio: 1—2 operators, maximum screen space, DAW workflow optimized, lots of storage.
- News/Copy Room: Multiple individual workstations, shared resources, ergonomics for long sessions.
Step 2: Measure Your Space (Precisely)
Custom furniture is only as good as the measurements it's built on. Here's what you need before any furniture consultation:
- Width and depth of the room (measure at multiple points — rooms aren't always perfectly square)
- Location and swing direction of all doors
- Location and dimensions of all windows
- HVAC vent and return air locations
- Electrical outlet and data port locations
- Any columns, beams, or structural elements
- Ceiling height
💡 Pro Tip
A rough hand sketch with measurements is perfectly fine. We'll refine it into a professional layout during your consultation. Don't let imperfect documentation stop you from starting the conversation.
Step 3: Map Your Equipment List
Your furniture has to house your equipment — so the equipment list drives the furniture design. Create a complete list that includes:
- Broadcast console or mixer (model and exact dimensions)
- Number and size of computer monitors
- Computer towers or rack-mounted computers
- Rackmount equipment (how many rack units?)
- Phone systems and headphone distribution
- CD players, turntables, or other playback equipment
- Mic arms (and mounting preference — through-desk or clamp)
- UPS battery backup systems
If you're buying new equipment for this build, get exact dimensions before finalizing furniture orders. Equipment changes mid-build are expensive.
Step 4: Plan the Cable Infrastructure
This is where 80% of studio furniture purchases go wrong. People think about the desk, not about what goes through it.
A professional air studio might have:
- 20—30 audio cables
- 8—15 video/display cables
- 6—10 USB and data cables
- 4—8 power circuits
- Phone lines and ethernet
All of these need pathways. Designcraft furniture is designed with through-top cable access points, under-desk cable management trays, and clean rear access panels — so your installer can get cables where they need to go without cable chaos visible anywhere.

Step 5: Design the Furniture Layout
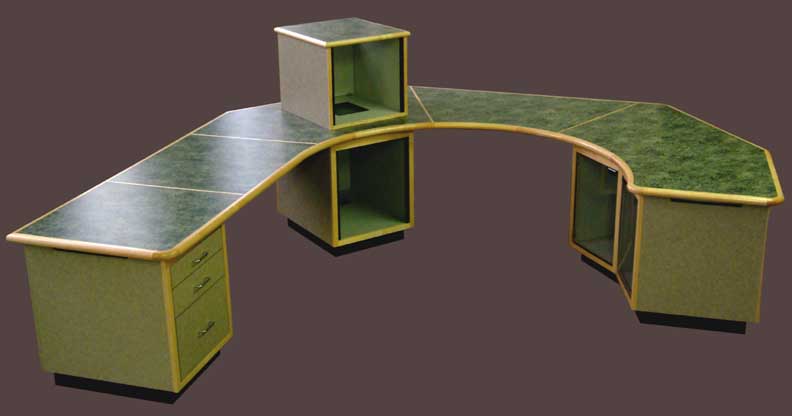
With steps 1—4 complete, you have everything needed to design the furniture layout. At this stage, we typically provide a CAD drawing or detailed sketch of the proposed layout, which lets you visualize the space before anything is built.
Key layout principles:
- Ergonomics first: Can the primary operator reach everything without straining? Are monitors at the right height and distance?
- Traffic flow: Can people enter, exit, and move around the desk without disrupting the operator?
- Door clearance: Does the furniture clear door swings? (More often missed than you'd think.)
- Future expansion: Is there room for one more rack unit, one more monitor position?
Step 6: Choose Your Surface Materials
Designcraft furniture is available in three material tiers. Your choice should be based on three factors: budget, aesthetic goals, and how the room will be used on camera (if ever).
Corian® or Hardwood (Premium): Solid surface Corian is non-porous, heat-resistant, scratch-resistant, and looks exceptional on camera. Hardwood nosing adds a warmth and prestige that photographs beautifully. Choose this for flagship studios, client-facing spaces, or video-facing setups.
High-Pressure Laminate (Pro Standard): The most popular choice. Dozens of colors and textures, extremely durable, and can be matched to equipment aesthetics or station branding. Performs identically to premium in daily use.
Economy Laminate: Same structural integrity, more limited color options, budget-conscious pricing. The right choice for satellite rooms, production rooms that are never on camera, or auxiliary spaces.
Step 7: Set Your Timeline and Budget
Custom studio furniture is not a next-day purchase. Plan for:
- Lead time: Typically 4—8 weeks from order to delivery, depending on project complexity and current production volume.
- Installation day: Budget 1—3 days for installation, depending on room count and complexity.
- Coordination with construction: Order furniture after construction is substantially complete and final dimensions are confirmed.
Quick Budget Reference
The Bottom Line
A well-planned radio studio is an investment that pays off every day — in operator efficiency, equipment longevity, and the professional image you project to visitors, advertisers, and the on-air talent you're trying to attract.
The best time to involve a studio furniture specialist is early in the planning process — before construction begins, if possible. We can often spot planning issues that would have been expensive to fix later.
If you're in the planning stages of a radio studio build, reach out to Designcraft. We're happy to review your plans, answer questions, and help you think through the layout — before you've spent a dollar on furniture.